A simpler way to make flowcharts in Notion and Github
Jeremy Sarchet · September 26, 2022
Jeremy Sarchet · September 26, 2022
Sooner or later in development work, there comes a time where you just need a flowchart.
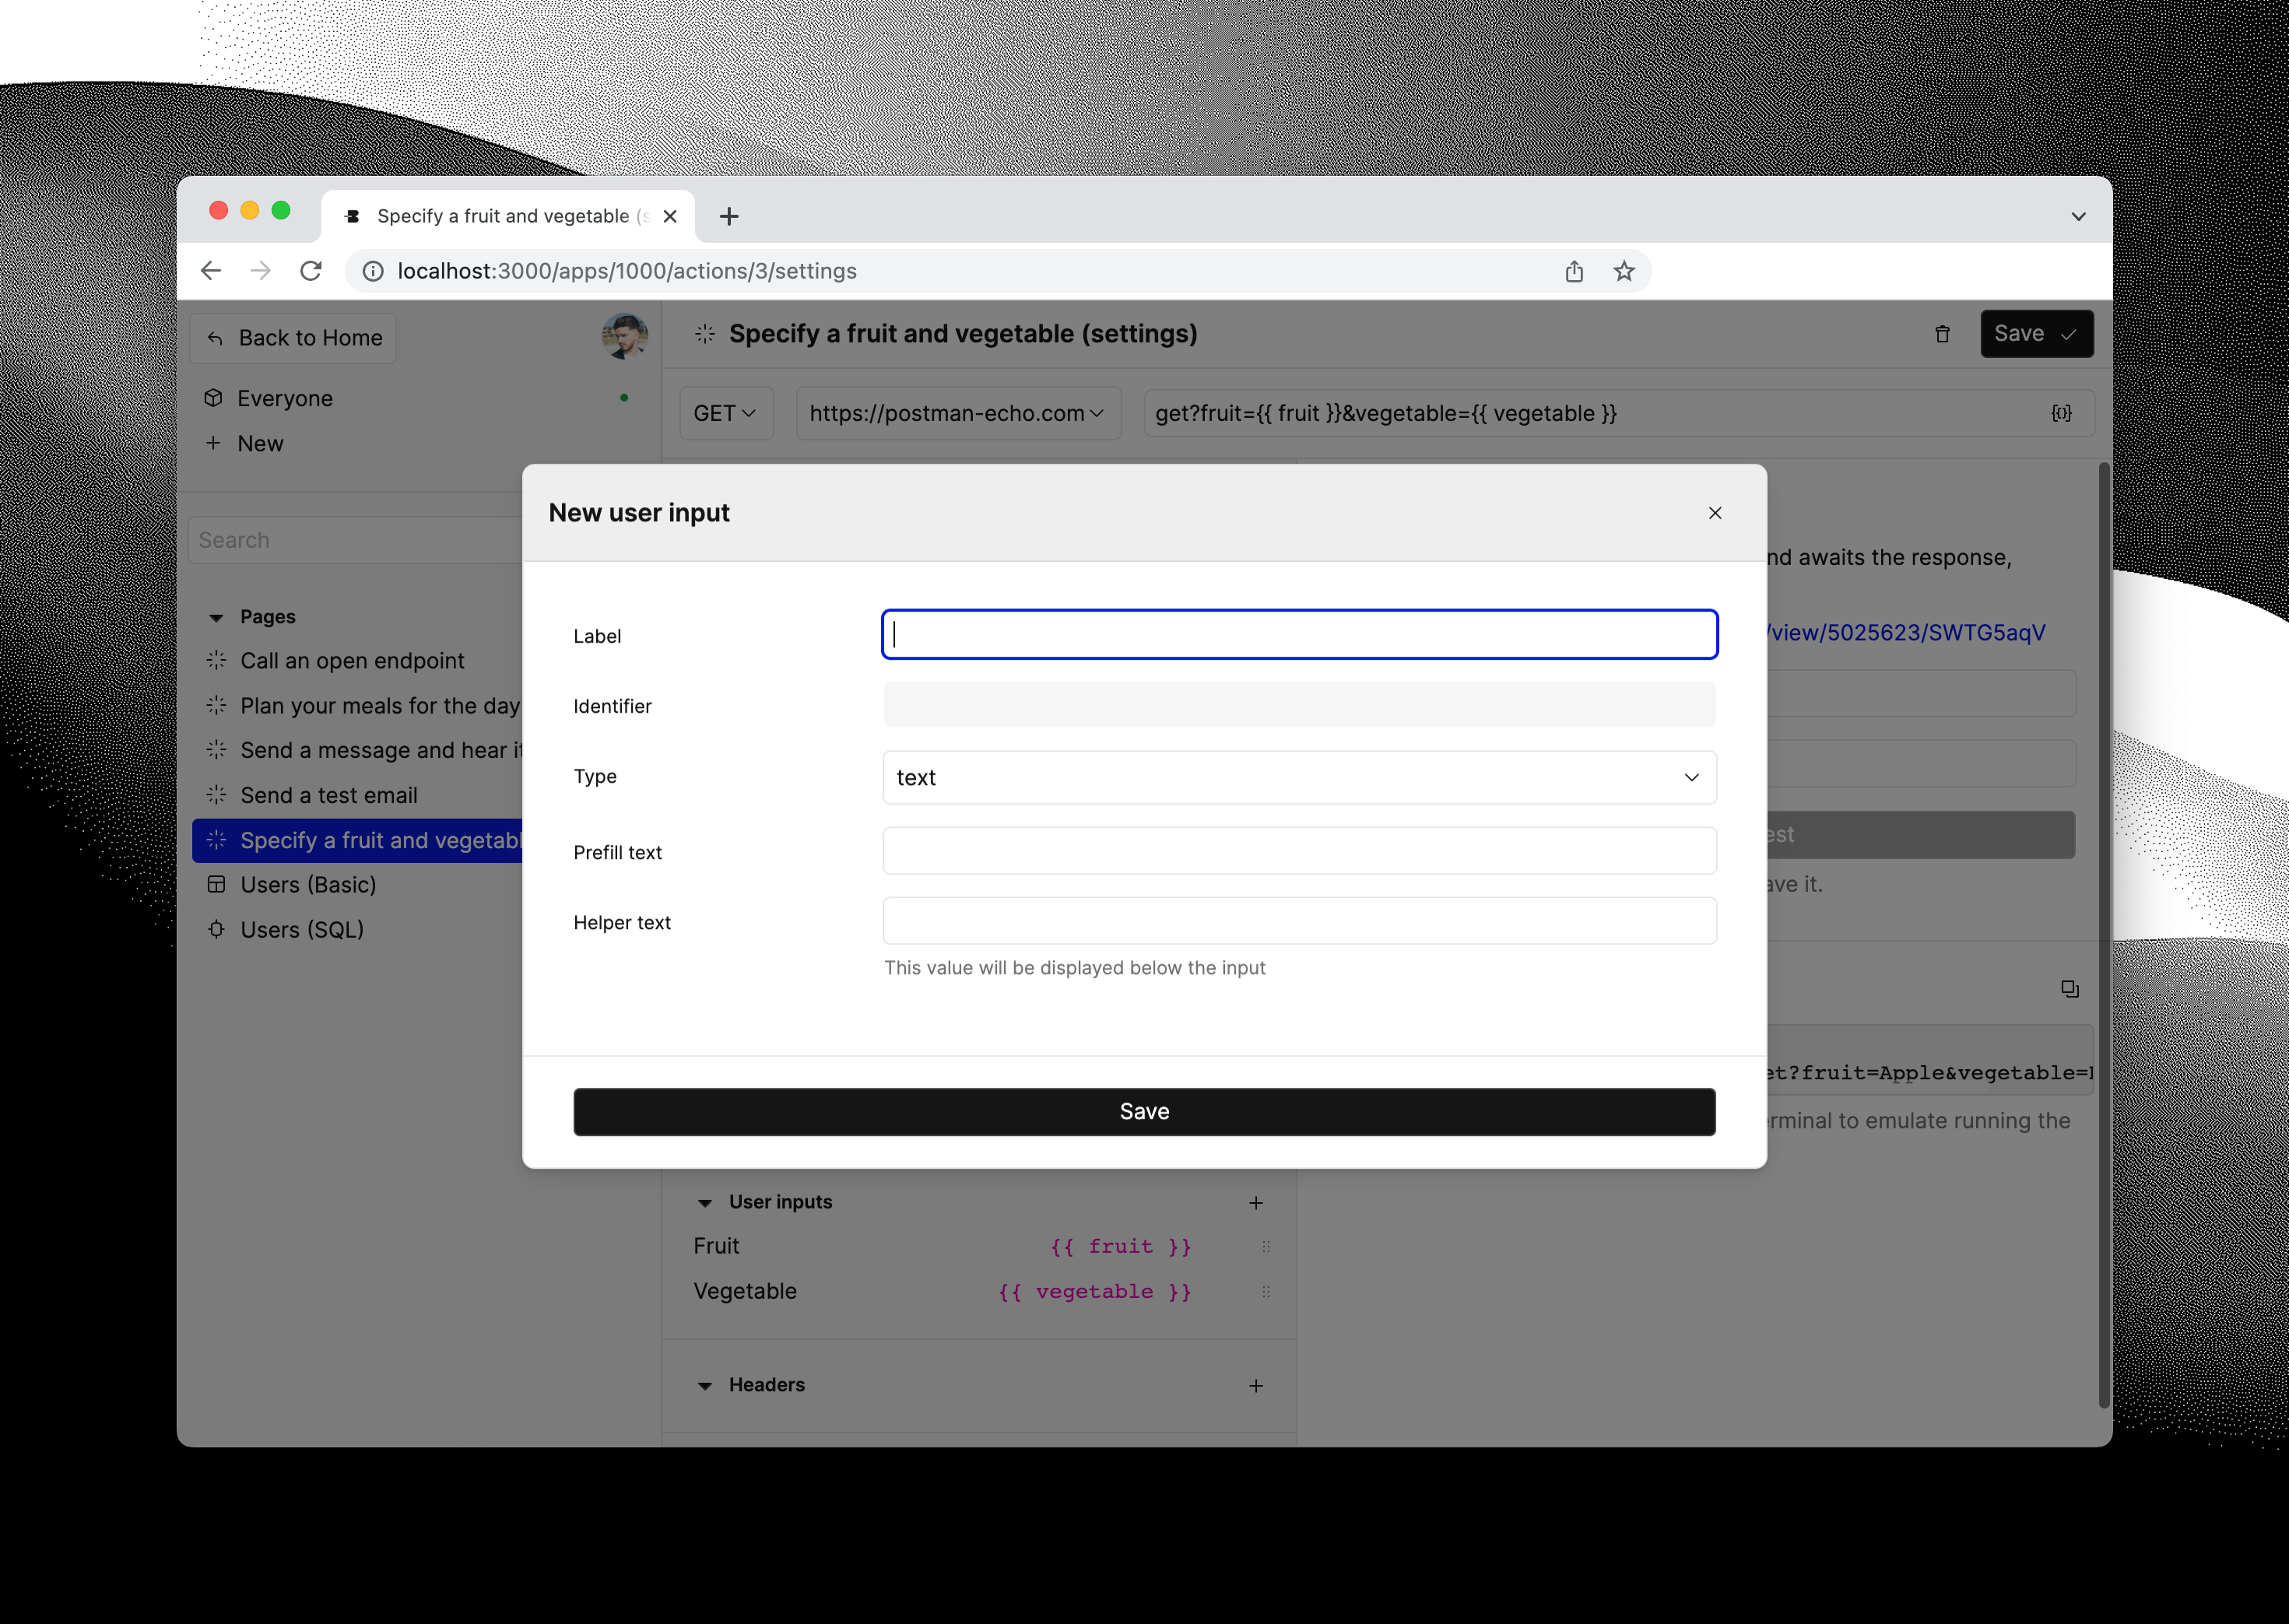
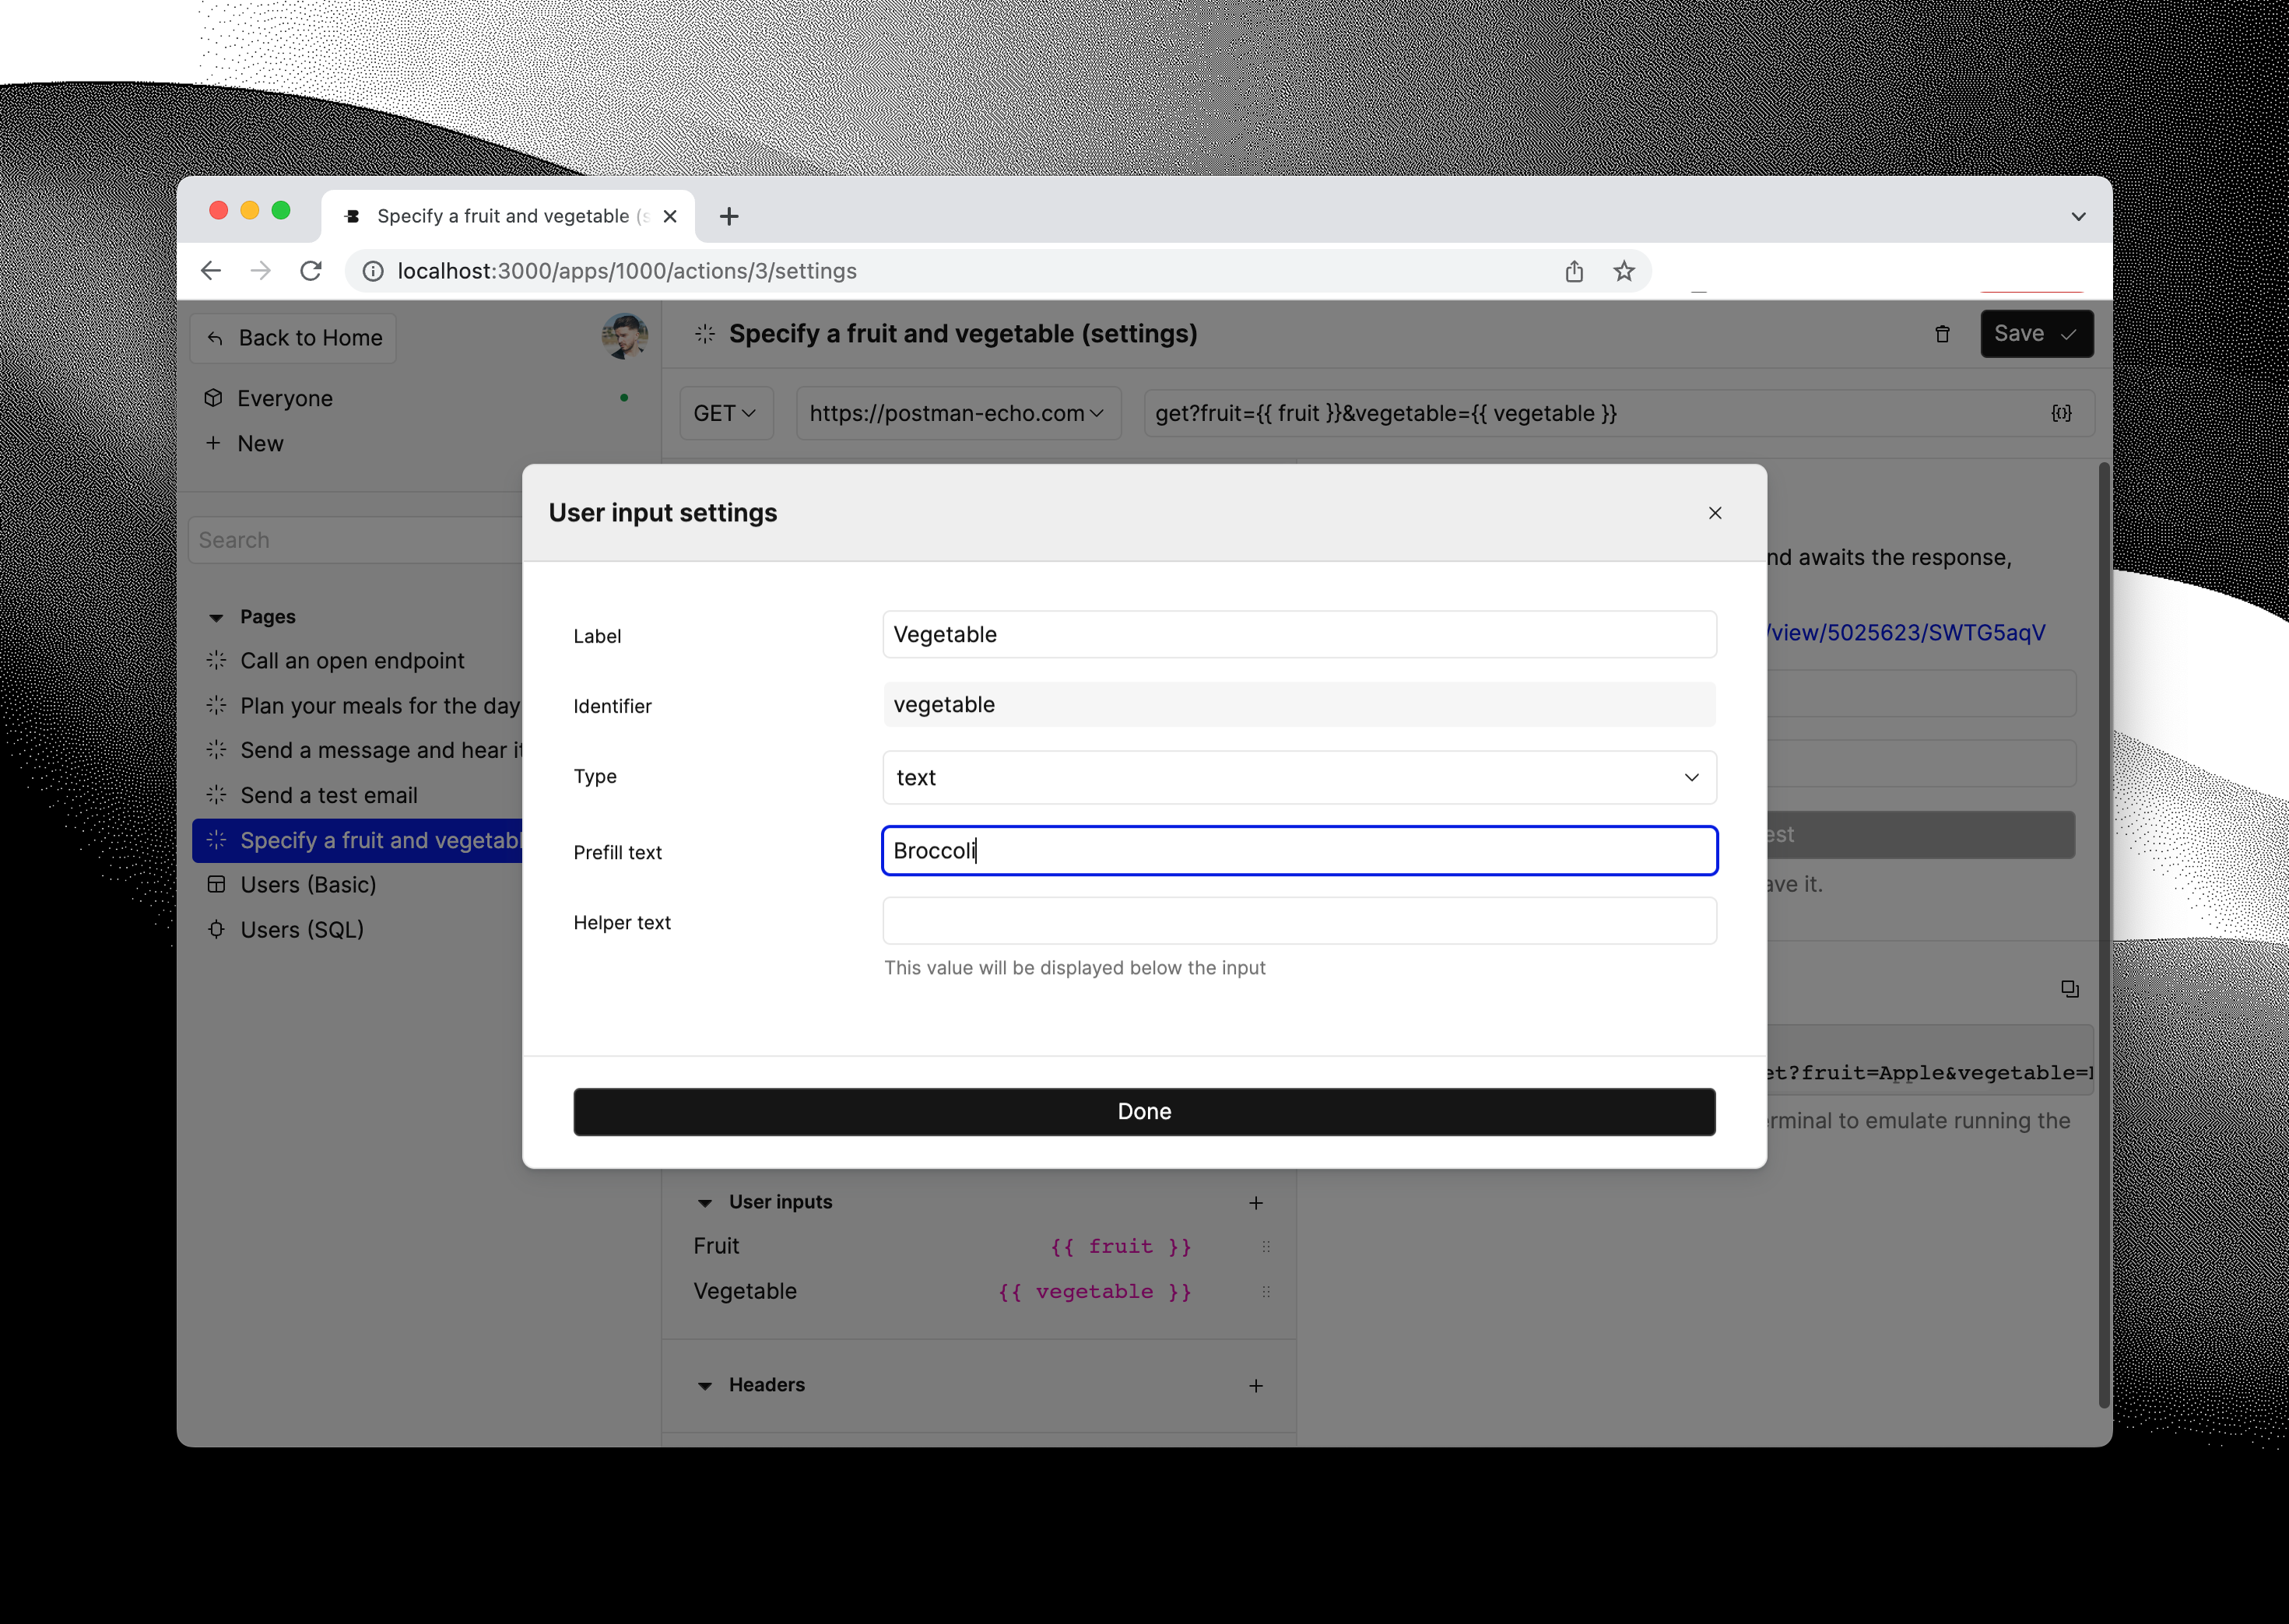
Recently at Basedash we were designing a UI pattern for managing items using a modal. We wanted a slightly different behavior depending on whether you’re adding a new item, or editing an existing item. Here’s what the modal looks like (for defining a User Input for an Action):
We started out with a desire to do up-front validation, where if a user provides invalid values for a given item (e.g. leaves a required field empty), then we would not permit the item to be saved, we would keep the modal open and prompt the user to fix the issue or discard the item.
This up-front validation approach adds complexity, so much so that I felt a need to make a flowchart to use for development. I was hesitant to reach for a drawing/design application, or for dedicated flowchart software. I prefer to keep my tooling fairly minimal. That’s why, after searching around a bit, I was happy to come across Mermaid. I love the ability to just worry about the structure and leave the drawing part to be automatically generated.
Mermaid is tool which will generate a nice flowchart for you from plain text. You use Mermaid’s syntax to define the nodes and connections in the flowchart, and Mermaid renders a nice vector image for you. And what’s more, it is supported by Notion, and by GitHub, so you can share your flowcharts with your collaborators in such places.
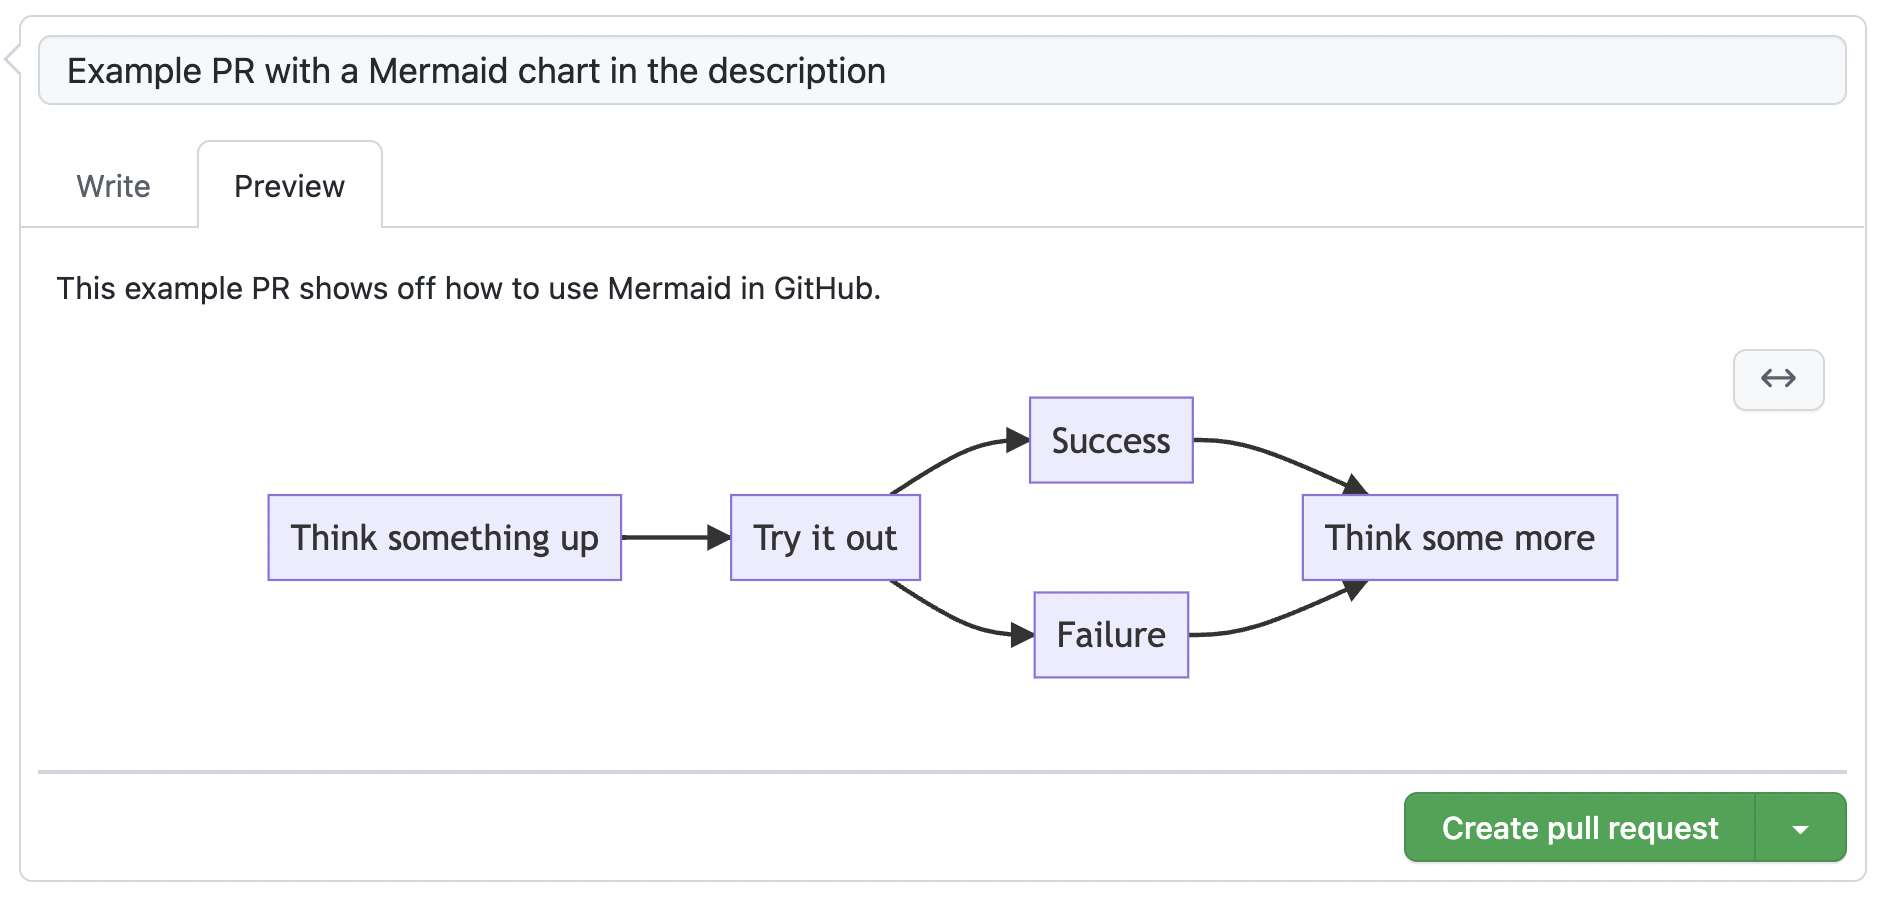
In any area that supports Markdown, for example, a PR description, add a Mermaid diagram by putting it inside a triple-backtick-delimeted code block with the “mermaid” designation, like so:
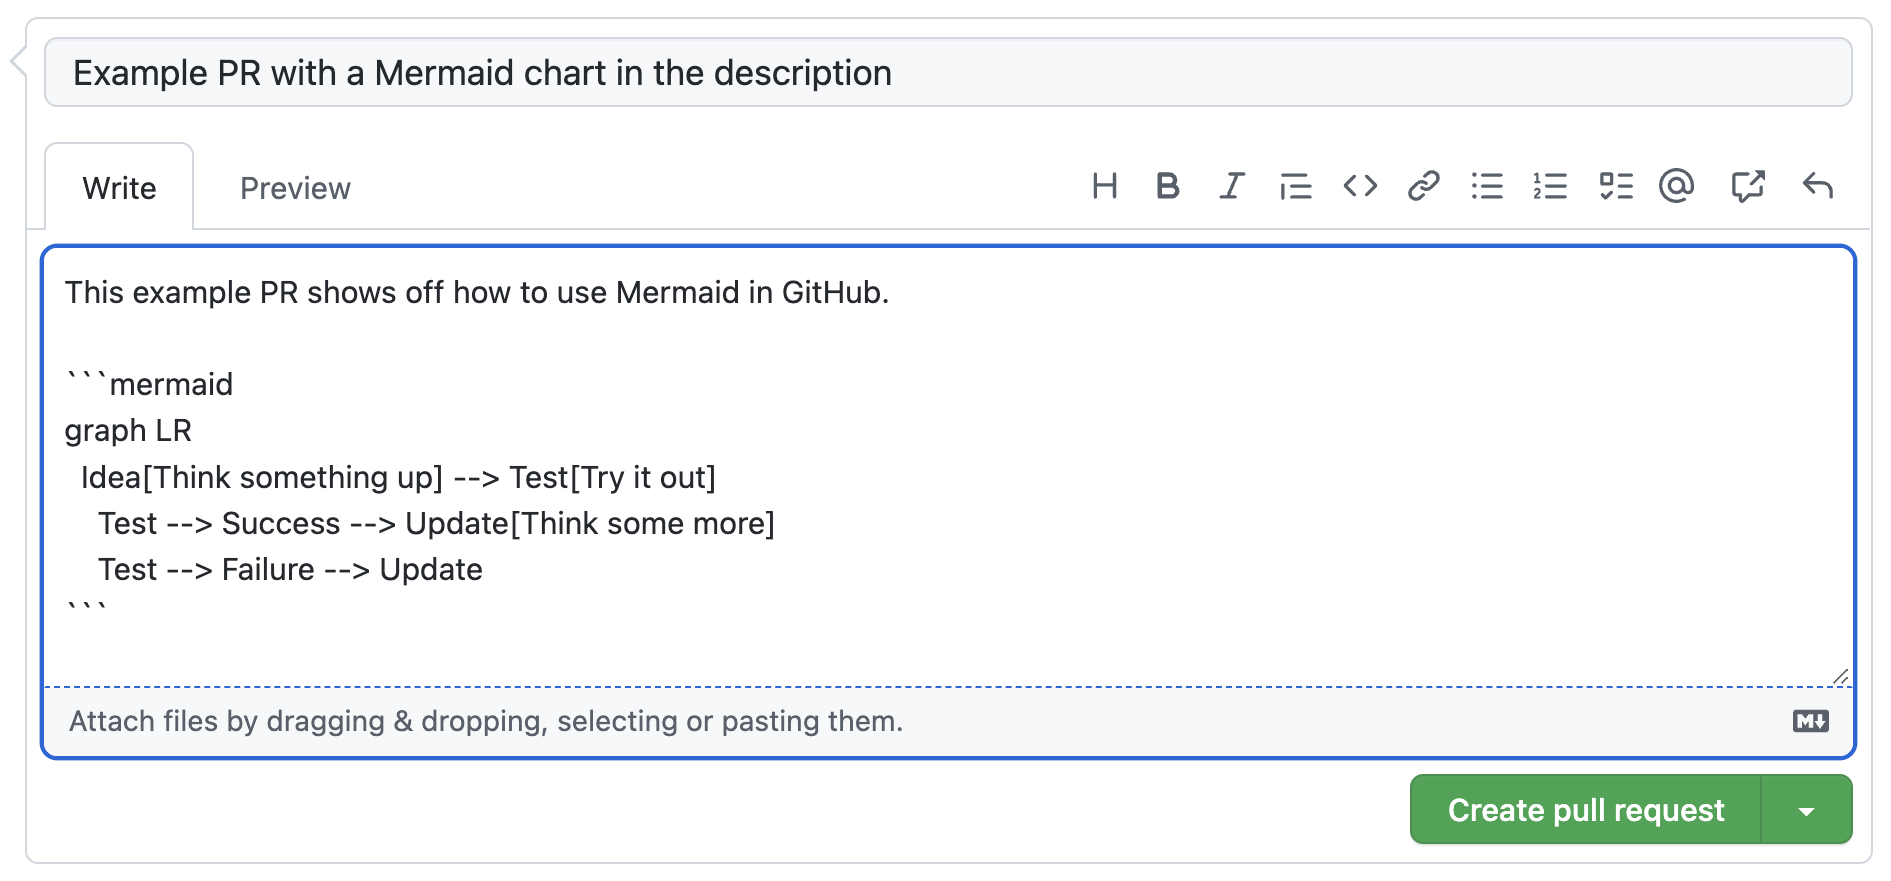
And then toggle between “Write” and “Preview” to see the rendered flowchart, like so:
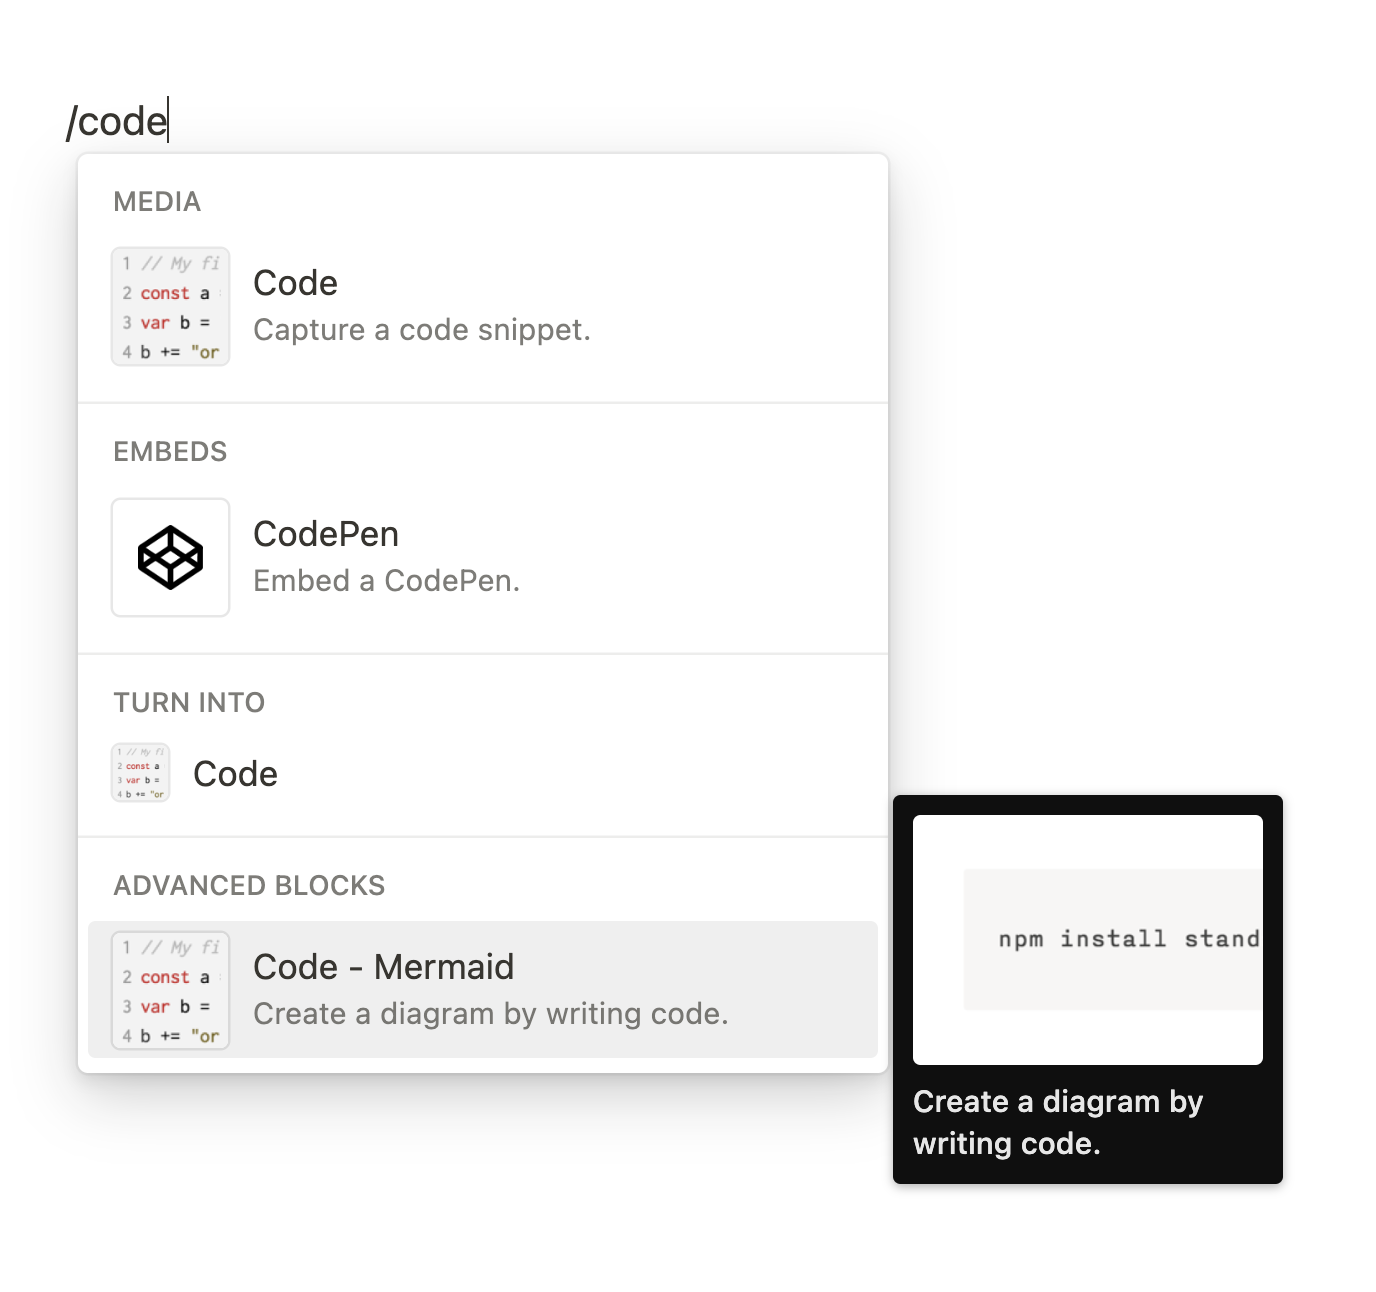
In Notion, type forward-slash then “code”, and you should see a prompt to create a code block. There’s an additional code block option for a Mermaid block, like so:
Then you can edit your Mermaid code and see the flowchart there below, like so:
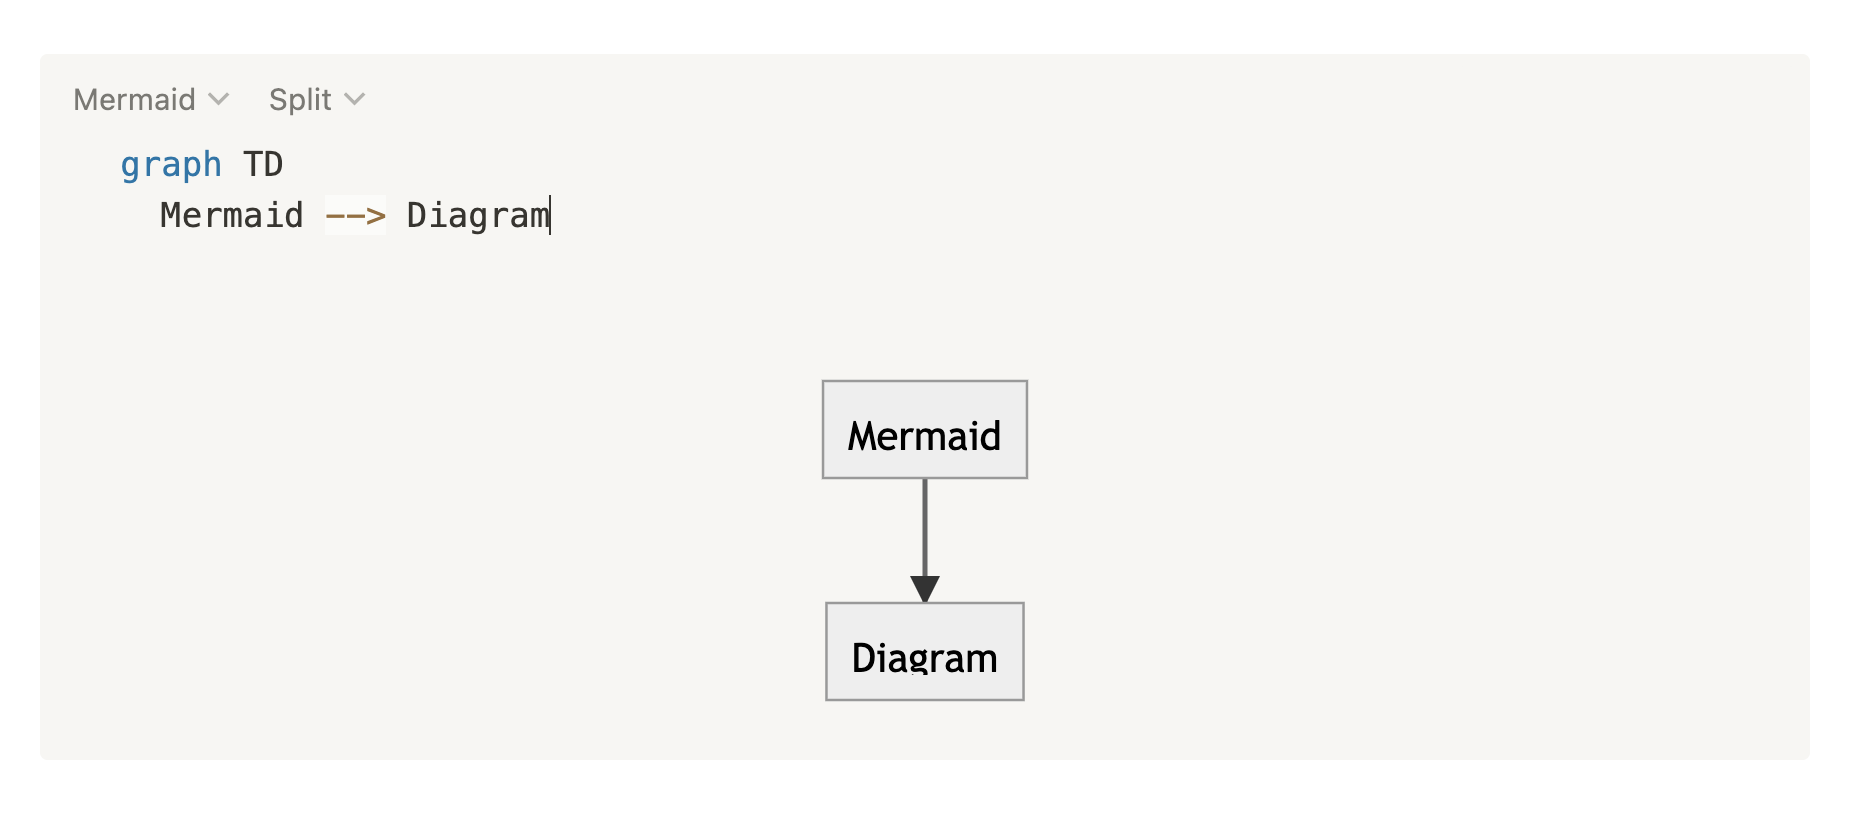
There’s also a dropdown to change between “Split” (shows both the code and the generated chart together), and “Code” (shows just the code), and “Preview” (shows just the generated chart).
Here’s the flowcharts (and the code that generates them) for the aforementioned modal logic, done in Mermaid:
graph LR
  Add[Add item] --> ValidEdit[Make valid edit]
    ValidEdit --> Save --> SuccessfulSave([Item added])
    ValidEdit --> DiscardEdit[Discard] --> ConfirmDiscard([Sure you want to discard without saving?])
    ValidEdit --> DismissEdit[Click outside/X/Esc] --> ConfirmDiscard
      ConfirmDiscard --> |Cancel| Nothing([Nothing happens])
      ConfirmDiscard --> |OK| Abort([Modal closes, item not added])

  Add --> DiscardNothing[Discard] --> Abort
  Add --> DismissNothing[Click outside/X] --> Abort
  Add --> CantSave([Save is disabled])

  Add --> InvalidEdit[Make invalid edit]
    InvalidEdit --> CantSave
    InvalidEdit --> DiscardInvalidEdit[Discard] --> ConfirmDiscard
    InvalidEdit --> DismissInvalidEdit[Click outside/X/Esc] --> ConfirmDiscard
graph LR
  Update[Select existing item] --> ValidEdit[Make valid edit]
    ValidEdit --> Save --> SuccessfulSave([Item updated])
    ValidEdit --> DismissEdit[Click outside/X/Esc] --> ConfirmAbort([Sure you want to discard edits?])
      ConfirmAbort --> |Cancel| Nothing
      ConfirmAbort --> |OK| ModalJustCloses
    ValidEdit --> Delete --> ConfirmDeletion([Sure you want to delete?])

  Update --> Confirm --> ModalJustCloses([Modal closes, nothing updated])
  Update --> DismissWithoutChanges[Click outside/X] --> ModalJustCloses

  Update --> Delete
      ConfirmDeletion --> |Cancel| Nothing([Nothing happens])
      ConfirmDeletion --> |OK| ItemDeleted([Item deleted])

  Update --> InvalidEdit[Make invalid edit]
    InvalidEdit --> Delete
    InvalidEdit --> CantSave([Save is disabled])
    InvalidEdit --> DismissInvalid[Click outside/X/Esc] --> ConfirmAbort
Having such a flowchart as a reference has proven helpful for clarifying and enumerating the possible conditions and the expected behavior for each. They’re not necessarily intended for implementation purposes, for that we take the codebase as the source of truth, but here’s where they have proven valuable:
After coming away with a viable implementation of the above flowcharted behavior, after reflecting on it, and further discussion, we decided that this up-front validation was more trouble than it was worth, both from a user experience standpoint, and from a code maintenance standpoint. We also landed on a different philosophy for this kind of UI flow: let the user provide invalid input, don’t block them right away. Let them even perhaps save invalid input, and then, when the time is appropriate, give a warning, and when the time comes that the user attempts to execute what they’re working on, given the invalid input, only then will they have the need to remedy the issue. Like letting a developer save a code file even though it may have a syntax error.
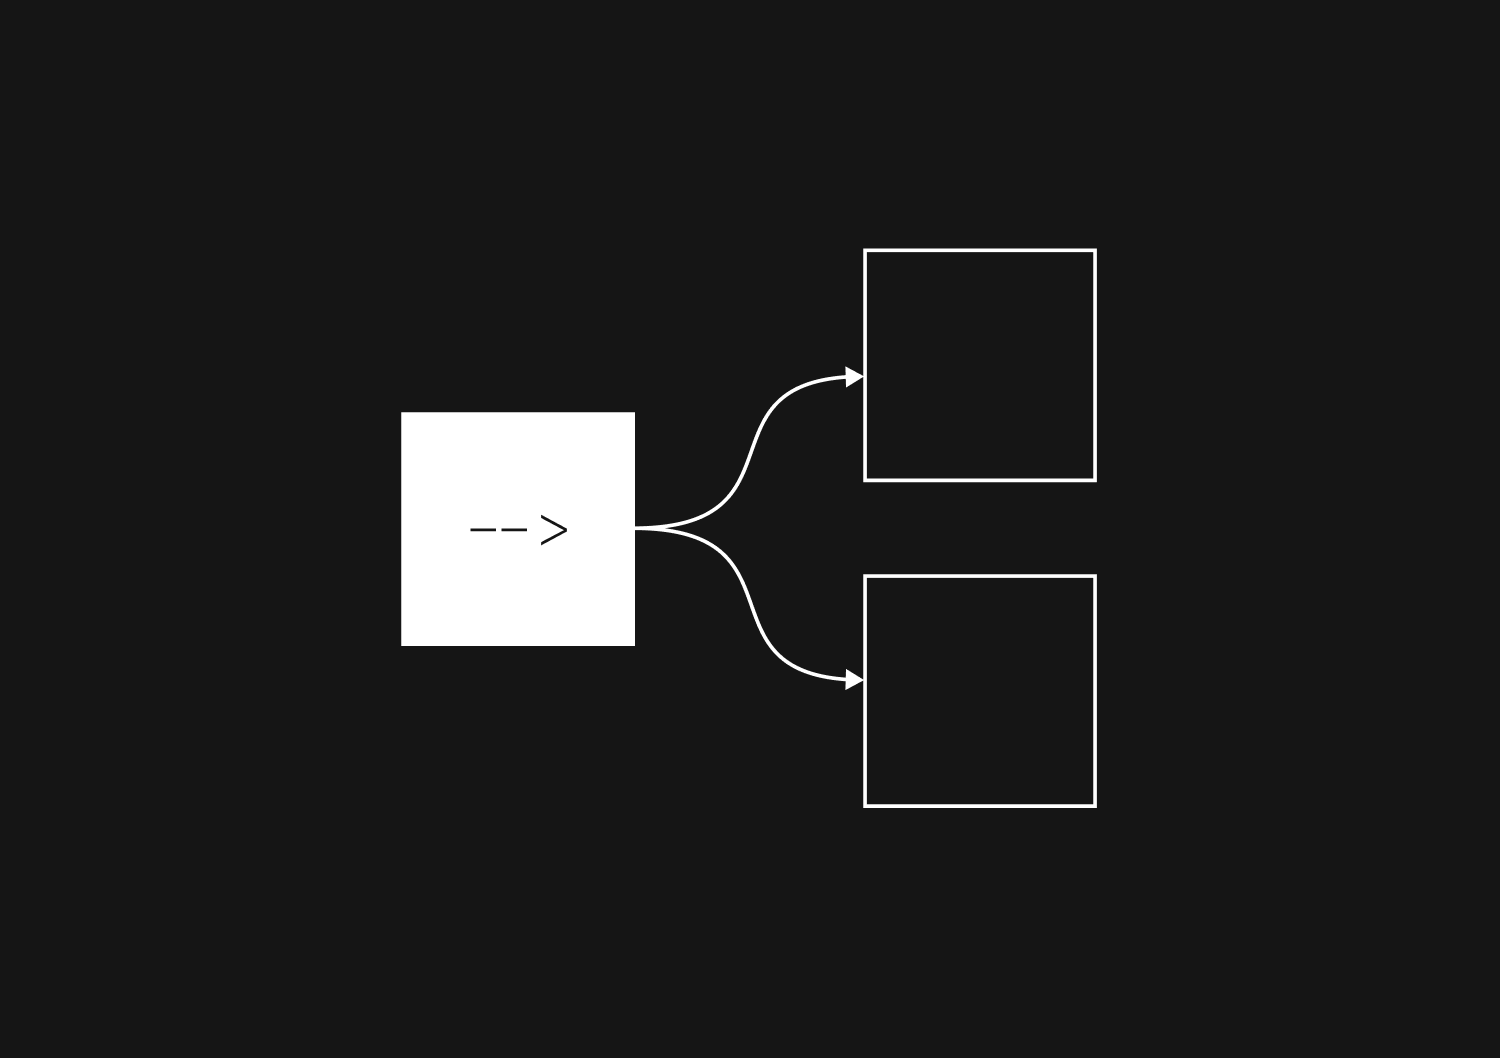
So, after doing away with up-front validation, here’s how much simpler things stand now:
graph LR
  Add[Add item] --> Edit[Make edit]
    Edit --> Save --> SuccessfulSave([Item added])

    Edit --> Discard[Click outside/X/Esc] --> ConfirmDiscard[Sure you want to discard?]
      ConfirmDiscard --> |Cancel| Nothing([Nothing happens])
      ConfirmDiscard --> |OK| Abort([Modal closes, item not added])

  Add --> DismissNothing[Click outside/X/Esc] --> Abort
graph LR
  Update[Select existing item] --> Edit[Make edit or not]
    Edit --> Done --> SuccessfulUpdate([Item updated])
    Edit --> Dismiss[Click outside/X/Esc] --> SuccessfulUpdate
Isn’t that simplification just lovely? Makes me think, if we weren’t barking up the wrong tree in the first place, pursuing “up-front validation”, we wouldn’t have had such a complex UI development task, and I wouldn’t have ended up wanting to make a flowchart, and possibly, I wouldn’t have discovered Mermaid at all.